https://learn.microsoft.com/en-us/purview/autoexpanding-archiving
https://learn.microsoft.com/en-us/purview/enable-autoexpanding-archiving
To reset the grace period, there are actually just 3 steps involved:
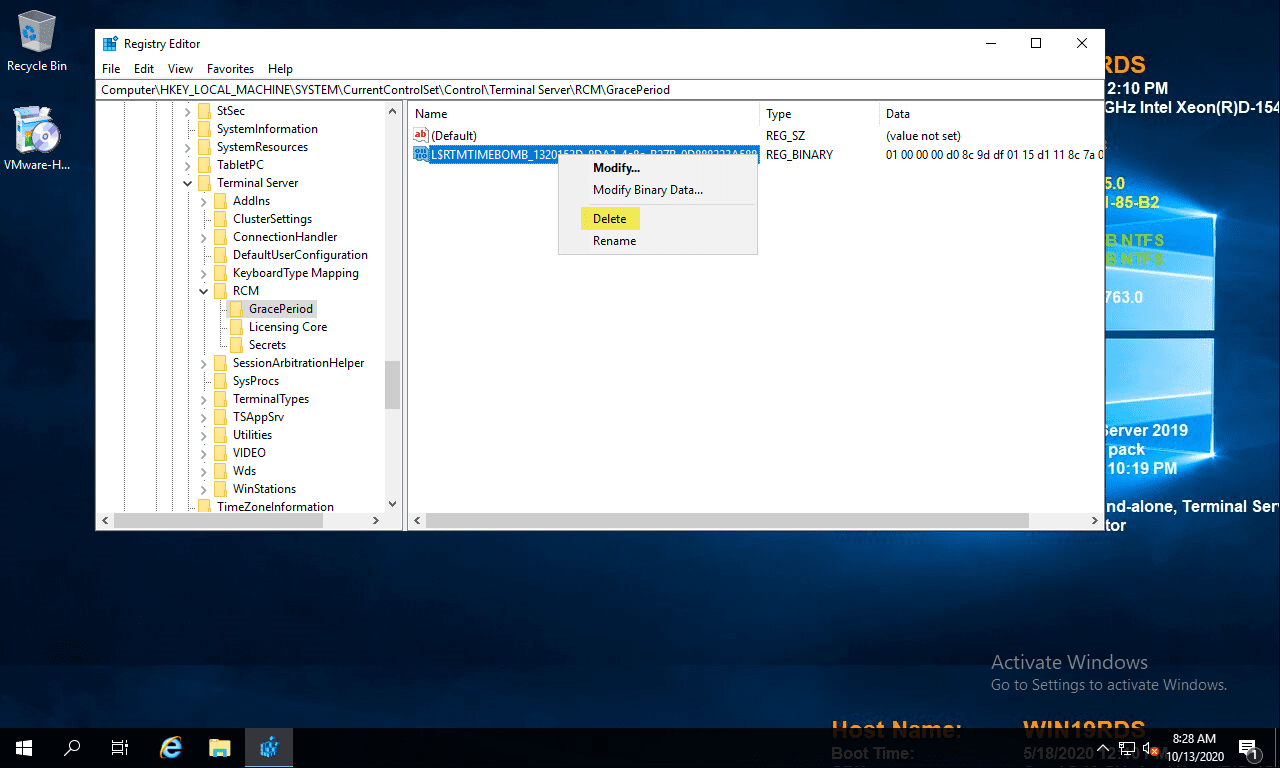
you need to navigate to the following key location on your RDS server:
Computer\HKEY_LOCAL_MACHINE\SYSTEM\CurrentControlSet\Control\Terminal Server\RCM\GracePeriod
Open a command prompt, and type regedit. After you have navigated to the key documented above, right-click GracePeriod and select Permissions.
For obvious reasons, there are no default permissions on this key for even Administrators. So you have to first take ownership of the key before you can delete the timebomb value. Click the Advanced button on the permissions dialog box.
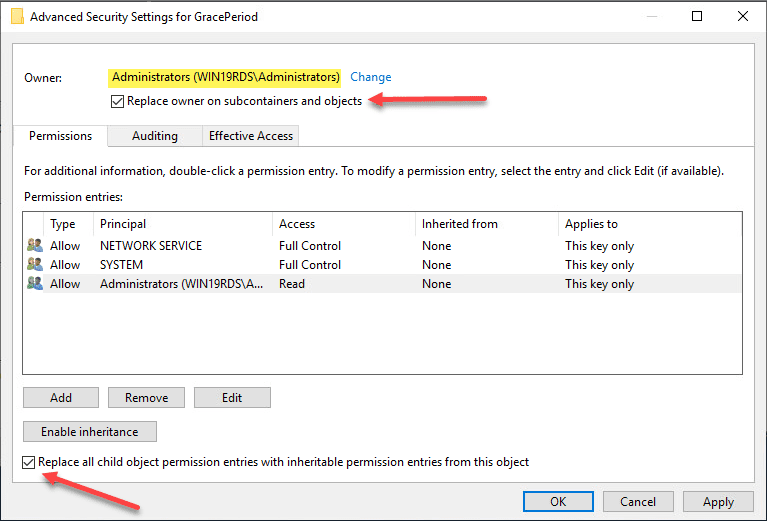
Click the Change button next to the Owner.
Here I have selected local administrators group as the owner of the key. However, you will want to choose whichever user/group you want to use to delete the registry key. Select the options to replace owners at the top and replace all child object permissions at the bottom. Click OK
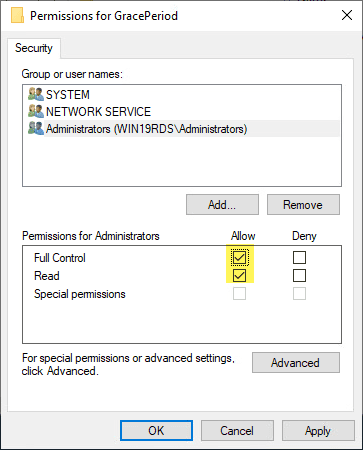
Now that we have changed ownership on the key, we can actually set permissions without getting permissions errors. Here I am granting administrators full control on the key.
On the right side of the Registry delete the entry “LSRTMT…”
Reboot
https://www.virtualizationhowto.com/2020/10/reset-120-day-rds-grace-period-on-2016-and-2019/
copy the quicken.ini file from the old computer
c:\programdata\intuit\quicken\config\quicken.ini
I tried backing up the boot drive of an older Dell Inspiron and restoring it to a new Dell Inspiron 3020 but the new Dell UEFI BIOS doesn’t support booting from an MBR. The solution is to convert the hard drive from MBR to GPT.
Steps to convert MBR to GPT.
1. Restored the backup of old Dell to an M.2 drive and put it in a computer that supports MBR.
2. Booted from a USB drive with Windows 11.
3. Opened Command Prompt
4. Run Diskpart and see what is the drive number is of the M.2 drive
5. Go to windows\system32 and run mbr2gpt /validate /disk:x (where x is the drive #)
6. If validation is successful then run mbr2gpt /convert /disk:x (where x is the drive #)
7. Installed the M.2 drive in the new Dell computer.
8. In the UEFI BIOS of the new Dell computer I change the following 2 items. I am not sure if they were all necessary (1. changed RAID to AHCI/NVMe. 2. turned off Secure boot.)
Errors
https://learn.microsoft.com/en-us/windows/deployment/mbr-to-gpt
Four log files are created by the MBR2GPT tool:
These files contain errors and warnings encountered during disk validation and conversion. Information in these files can be helpful in diagnosing problems with the tool. The setupact.log and setuperr.log files have the most detailed information about disk layouts, processes, and other information pertaining to disk validation and conversion.
