I am computer technician and have been working in the field for over 25 years. I grew up with computers at home and we had them before my school had any.
If your Windows 10 computer was installed using the old MBR(Mater Boot Record) and you are trying to migrate your installation to a new computer or you are trying to upgrade to Windows 11, you can convert your MBR to at GPT partition. This link tells you how. https://learn.microsoft.com/en-us/windows/deployment/mbr-to-gpt
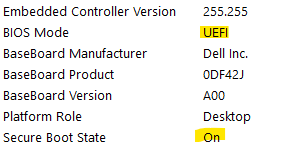
To check if your installation of Windows 10 is ready, run MSINFO and look for BIOS Mode. If it says UEFI then you are all set, but if it says Legacy then you need to convert you partition style from MBR to GPT.
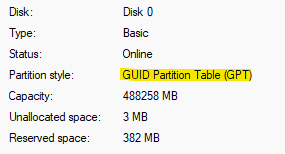
You can also check by opening Disk Management, right click on the drive at the bottom of the screen and select Properties, click on the Volume tab. If it say GPT you are all set, if it says MBR you need to convert your patition.
Convert your system using MBR2GPT. You can run this from booting off of a Windows 10 or 11 USB driver or from a live Windows install.
Just in case there are multiple drives in your computer we can specify the drive in the conversion process. Open a Command Prompt and run DISKPART, type LIST DISK. Make note of the disk number of the OS Drive.
From a Windows PE USB, the MBR2GPT utility is located in the Windows\System32 directory. Run MBR2GPT /VALIDATE /DISK:x. If everything is OK it should look like this.
Now lets convert the partition from MBR to GPT. At the command prompt run MBR2GPT /CONVERT /DISK:x. If it worked it should look like this.
2. Now we need to boot into the BIOS and make sure that BOOT mode from Legacy to UEFI compatible and possibly turn on Secure Boot. If the computer boots up open MSINFO and check that BIOS MODE says UEFI and SECURE BOOT STATE says ON. See image at top of page
If you get an error 0x00000000 then try the following command mbr2gpt /convert /disk:x /map:222=ebd0a0a2-b9e5-4433-87c0-68b6b72699c7
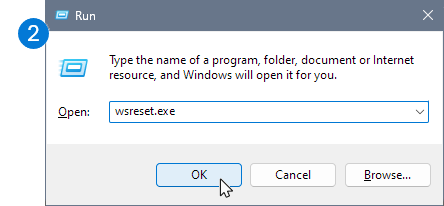
1. On your computer keyboard, press the Windows key and R at the same time to open the Run dialog box.
2. Copy or type wsreset.exe into the box then select OK.Note: A blank Command Prompt window will open and close briefly, then the Microsoft Store app will open. You can ignore these and close any unwanted windows.
If OneDrive is still not syncing, let’s continue with resetting the OneDrive sync app.
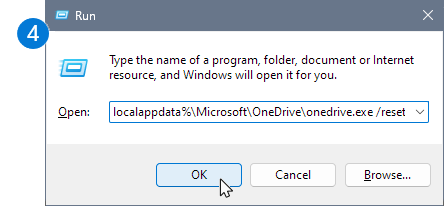
3. Press the Windows key and R again.
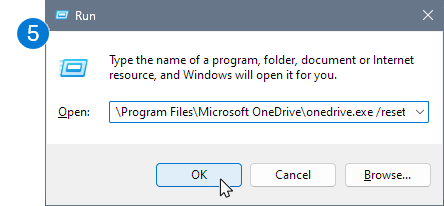
4. This time copy the text below and paste it into the dialog window, then press OK.
6. If you still see a “Windows cannot find…” message, copy and paste the text below instead, then press OK.
C:\Program Files (x86)\Microsoft OneDrive\onedrive.exe /resetNote: If none of these steps work, you do not have the OneDrive sync app installed. Learn more.
7. Manually restart OneDrive by going to Start , type OneDrive in the search box, and then click on the OneDrive desktop app.
click 3 lines on top left of Microsoft Authenticator
click settings
under Backup turn on iCloud Backup
Restore
on your new phone open authenticator and select “restore from backup”
you now need to sign in to each account and rescan the QR code. 1st sign in to each account using your old phone’s Microsoft Authenticator, then after you have signed in go to https://aka.ms/mfasetup
Click “Add sign-in method”
Click “Microsoft Authenticator”
After adding the new Authenticator to this account delete the old Microsoft Authenticator that is pointing to your old phone
An even better option is to switch to Google Authenticator which doesn’t have this stupid step.
when you select Microsoft authenticator in step 4 above, on the next screen you can choose “I want to use a different Authenticator app”